Moving a live website can feel risky, but it becomes much easier when the work is done in the right order. This guide explains how to migrate WordPress site to new host without losing content, breaking links, or creating unnecessary downtime. It is written for beginners who want a practical process instead of a technical checklist full of unclear hosting terms.
A WordPress migration has three big parts: copying the website files, moving the database, and pointing the domain to the new hosting server. If you also change the domain name, you must add redirects and update URLs. If you only change hosting, the goal is simpler: build a working copy on the new server, test it, then switch DNS when everything is ready.
The steps below combine practical migration ideas from WordPress education resources such as the Learn WordPress migration lesson, hosting backup guidance from Bluehost backup and restore migration guide, and hosting transfer checklists like VeerHost hosting migration guide and EXPERTE hosting provider change guide.
Table of Contents
What Does It Mean to Migrate a WordPress Site to a New Host?
To migrate a WordPress website means to move the working site from one hosting environment to another. Your domain can stay the same, your WordPress admin login can stay the same, and your visitors may never notice the change if the migration is prepared correctly.
A normal WordPress site is made of files and a database. The files include WordPress core, themes, plugins, uploads, and configuration files. The database stores posts, pages, settings, menus, product data, users, plugin settings, and many other records. A complete migration must move both parts.
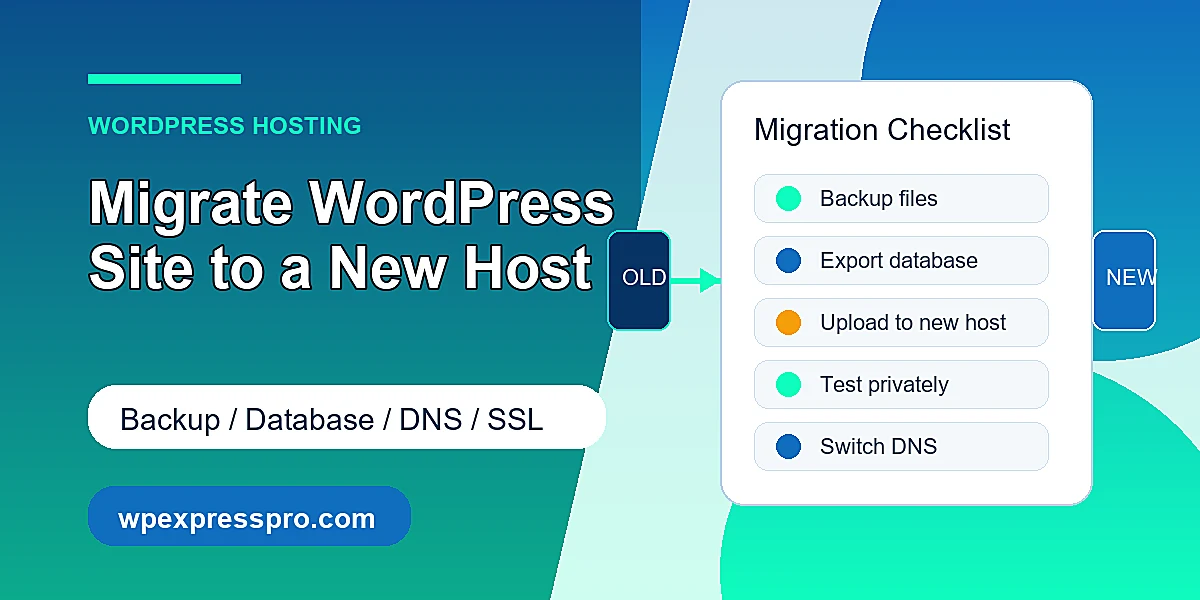
For most small business websites, the best migration approach is to make a full backup first, copy the site to the new host, test it privately, then update DNS. That order helps avoid downtime because the old site keeps working while the new one is being prepared.
When Should You Move to a New Hosting Provider?
Changing hosts is worth considering when your current hosting is limiting growth, support is slow, backups are unreliable, or performance is hurting SEO and conversions. Migration should solve a real problem, not create a new one.
- Your website loads slowly even after image optimization and caching.
- Your host has frequent downtime or unstable server response times.
- You need better WooCommerce support, staging, backups, or server resources.
- Your current plan does not support the traffic, storage, PHP version, or security features you need.
- You are changing agencies, consolidating websites, or moving to a managed WordPress host.
Before you migrate, compare the new host carefully. Check PHP and database versions, storage limits, backup policy, staging tools, email hosting, CDN options, and support response times.
Before You Start: WordPress Migration Checklist
A smooth migration starts before any file is moved. Gather access, confirm backups, and decide whether email, DNS, and domain registration are also moving.
- WordPress admin login for the current site.
- Old hosting control panel access, such as cPanel, Plesk, or a custom dashboard.
- FTP or SFTP access to download and upload website files.
- Database access through phpMyAdmin or a backup tool.
- New hosting account login and server details.
- Domain registrar login, especially if DNS records or nameservers must be changed.
- A full backup of files and database stored outside the hosting account.
- A list of active plugins, important forms, checkout pages, tracking scripts, and email settings.
- Current DNS records, including A, CNAME, MX, TXT, SPF, DKIM, and DMARC records.
If the site accepts orders, leads, bookings, or membership payments, choose a low-traffic migration window. For WooCommerce stores, consider putting the store into maintenance mode only during the final sync, not during the entire preparation period.
Choose a Migration Method
There are two common ways to migrate WordPress: use a migration plugin or do the process manually. Both can work. The right choice depends on website size, hosting access, budget, and how comfortable you are with databases.
Option 1: Use a WordPress Migration Plugin
Migration plugins are often the easiest option for beginners. They package the WordPress files and database, then help you import the site on the new host. This is useful when you do not want to manually export SQL files or edit server paths.
A plugin-based migration can still fail if the site is very large, the server has low memory limits, or the new host blocks large uploads. Create a separate backup before running any migration plugin.
Option 2: Manual Migration
Manual migration gives you more control. You download all WordPress files, export the database, upload everything to the new host, import the database, update the configuration file, and test the site. This approach is useful when a plugin cannot handle the site size or when you need to inspect every step.
Manual migration is more technical, but the logic is simple. WordPress needs the same files and the same database on the new server. Once the new server can read the database and serve the files, the site can run from the new host.
Step-by-Step: How to Migrate a WordPress Site to a New Host
Step 1: Create a Full Backup
Start by creating a full backup of your website files and database. Save a copy on your local computer or cloud storage, not only inside the old hosting account. If anything goes wrong, this backup is your recovery point.
For a manual backup, download the public_html or site root folder through FTP or the hosting file manager. Then export the database from phpMyAdmin as an SQL file. For a plugin backup, download the full package after the plugin finishes building it.
Step 2: Prepare the New Hosting Account
Log in to the new host and create the website space. Depending on the host, this may mean adding the domain, creating a WordPress install, or creating an empty hosting account for the domain. If the new host offers staging or temporary URLs, use them for testing.
Check the PHP version, memory limit, upload size, and database version. Try to match or improve the old environment. A site that worked on PHP 8.1 may not behave the same if the new host uses a much older or much newer version without compatibility testing.
Step 3: Upload WordPress Files
Upload the WordPress files to the correct directory on the new server. This is often public_html, but it may be a domain-specific folder on managed hosting. Make sure hidden files such as .htaccess are included because they may control permalinks, redirects, and security rules.
For large sites, SFTP is usually safer than browser-based file managers. After upload, check that the wp-content folder contains themes, plugins, and uploads. Missing upload folders are a common reason images disappear after migration.
Step 4: Create and Import the Database
Create a new database and database user on the new host. Give the user full permissions for that database. Then import the SQL backup using phpMyAdmin, Adminer, the hosting dashboard, or a command-line tool if your host supports it.
If the import fails, check the file size limit and timeout settings. Some hosts require large SQL imports to be split into smaller parts. You can also ask the new host to import the database for you if managed migration support is included.
Step 5: Update wp-config.php
Open the wp-config.php file on the new host and update the database name, database username, database password, and database host. These values must match the database you created on the new server.
Do not overwrite the file blindly if the new host created its own configuration rules. Compare both files and keep any host-specific settings that are required.
Step 6: Update URLs If the Domain Changed
If the domain name is staying the same, you usually do not need to change URLs in the database. If the domain is changing, update the site URL and home URL, then run a safe search and replace across the database.
Use a WordPress-aware search and replace tool because serialized data can break if you edit SQL with a basic text editor. After changing domains, create 301 redirects from old URLs to new URLs so search engines and visitors reach the correct pages.
Test the New Site Before Changing DNS
Do not point the domain to the new host until you have tested the migrated copy. Many hosts provide a temporary URL, preview link, staging domain, or hosts-file method for private testing. This is the most important downtime prevention step.
- Open the homepage, important pages, blog posts, and contact page.
- Log in to wp-admin and confirm plugins and theme settings still load.
- Check menus, widgets, footer links, images, downloads, and embedded media.
- Submit contact forms and confirm notification emails arrive.
- For WooCommerce, test cart, checkout, payment method display, tax, shipping, and customer emails.
- Check mobile layout on a phone-sized screen.
- Confirm SSL works on the new host before or immediately after DNS is switched.
If the new site looks broken, pause and fix it before the DNS change. A tested migration can be switched with minimal disruption. An untested migration turns DNS propagation into a stressful waiting period.
Point DNS to the New Host
DNS tells browsers where your domain should load from. To move traffic to the new host, update either the nameservers at the domain registrar or the individual DNS records, such as the A record and CNAME record.
If your email is handled by Google Workspace, Microsoft 365, Zoho, or another provider, be careful not to delete MX and TXT records. Many website migrations accidentally break email because the nameservers are changed without copying email records first.
DNS changes can take time to propagate. Some users may see the new server quickly, while others may still reach the old server for several hours. Keep the old hosting active for at least 48 to 72 hours after the switch so late DNS requests still reach a working website.
Post-Migration SEO and Technical Checks
After the domain points to the new host, check the website again from a normal browser and mobile device. The migration is not finished until SSL, redirects, analytics, forms, and indexing signals are working.
- Install or renew the SSL certificate and force HTTPS if needed.
- Go to Settings > Permalinks in WordPress and save once to refresh rewrite rules.
- Clear server cache, plugin cache, CDN cache, and browser cache.
- Check robots.txt and make sure the site is not blocked from search engines.
- Submit or verify the XML sitemap in Google Search Console.
- Confirm Google Analytics, Google Tag Manager, Meta Pixel, or other tracking scripts still fire.
- Check 404 errors and redirect important old URLs if the domain or URL structure changed.
- Run a speed test after caches are rebuilt.
If the migration involved only a hosting change and URLs stayed the same, SEO risk is usually low. If the migration also changed the domain, URL structure, or content, monitor Search Console closely because search engines need time to process redirects.
Common WordPress Migration Mistakes to Avoid
Most WordPress migration issues are preventable. The biggest mistakes come from rushing the DNS switch, moving only files without the database, or ignoring email records.
- Skipping the full backup before migration.
- Forgetting to export and import the database.
- Uploading files to the wrong folder on the new host.
- Missing hidden files such as .htaccess.
- Using the wrong database credentials in wp-config.php.
- Changing nameservers without copying email DNS records.
- Not testing forms, checkout, login, and mobile layout before launch.
- Canceling the old hosting account too early.
A careful migration is not about doing every step fast. It is about keeping a working version available while the new host is prepared, tested, and switched.
FAQ
Can I migrate a WordPress site to a new host without downtime?
Yes. The safest method is to copy the site to the new host, test it privately, then update DNS only after the new copy works. Keep the old hosting active for 48 to 72 hours after the switch.
What is the easiest way to migrate WordPress for beginners?
A trusted migration plugin is usually easiest for beginners because it packages files and the database together. Still, create a separate full backup before using any plugin.
Do I need to move both WordPress files and the database?
Yes. WordPress files contain themes, plugins, uploads, and configuration files. The database contains posts, pages, settings, users, and many plugin records. A complete migration needs both.
How long does DNS propagation take after changing hosts?
DNS changes can update quickly, but they may take up to 48 hours in some cases. During that period, some visitors may reach the old server and others may reach the new one.
Will migrating to a new host hurt SEO?
A hosting-only migration should not hurt SEO if URLs stay the same, SSL works, the site remains crawlable, and downtime is avoided. SEO risk increases when domain names or URL structures change without proper 301 redirects.
Should I cancel my old hosting immediately after migration?
No. Keep the old hosting active for at least a few days after DNS changes. This gives you time to confirm traffic, forms, email, SSL, and backups are working on the new host.
Final Thoughts
The best way to migrate WordPress site to new host is to treat the move as a controlled handover, not a rushed copy-and-paste job. Back up everything, prepare the new server, test before DNS, protect email records, and monitor the site after launch.
If you are moving a business website, do the final DNS switch during a low-traffic period and keep both hosting accounts active until you are fully confident. That small overlap is usually cheaper than recovering from lost leads, broken checkout pages, or missing email records.